Technical skills and creative approaches for stunning nighttime cityscapes.
Introduction: The Allure of Urban Nightscapes
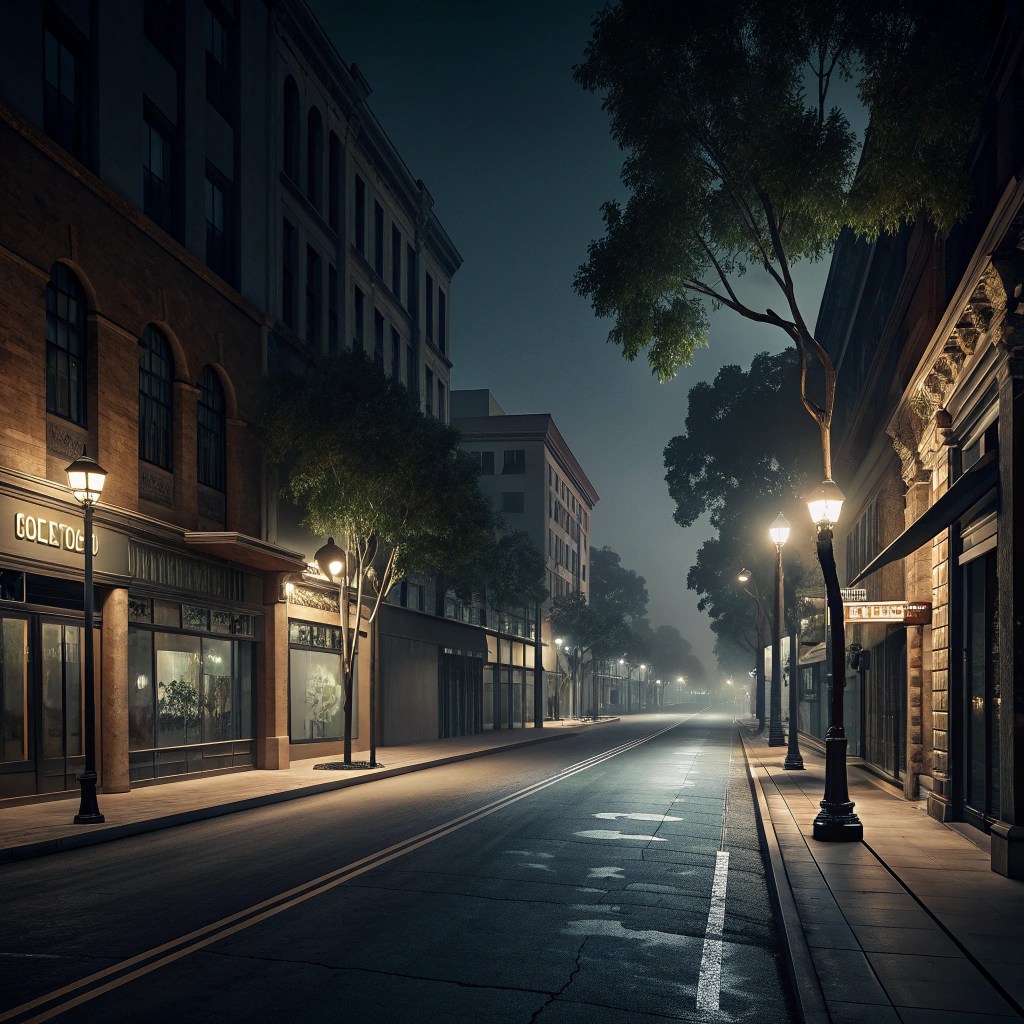
When the sun sets and darkness envelops the urban landscape, cities undergo a remarkable metamorphosis. Ordinary streets become rivers of light, towering buildings transform into luminous sculptures, and the familiar cityscape reveals a hidden personality that exists only after dark. This magical transformation is what draws photographers to pursue the challenging yet deeply rewarding art of urban night photography.
Night photography presents a unique paradox: it offers both significant technical challenges and unprecedented creative opportunities. The scarcity of natural light demands a mastery of camera settings and equipment that daylight photography rarely requires. You’ll wrestle with issues like motion blur, digital noise, extreme contrast between highlights and shadows, and the constant need for stabilization. Yet these very challenges unlock creative possibilities that simply don’t exist during the day. Long exposures transform moving traffic into elegant light trails, neon signs become vibrant brushstrokes of color, and reflections on wet pavement create mirror worlds that double the visual impact of your compositions.
Essential Gear Selection
Understanding the equipment that makes night photography possible, from camera bodies to specialized accessories
Technical Mastery
Learning to control ISO, aperture, and shutter speed to capture clean, sharp images in low-light conditions
Compositional Excellence
Applying proven techniques to create compelling visual narratives using urban elements and light
Creative Innovation
Experimenting with motion, atmosphere, and timing to develop your unique photographic voice
Post-Processing Refinement
Polishing your captures through strategic editing to achieve professional-quality final images
This masterclass will guide you through every aspect of capturing stunning urban nightscapes. Whether you’re standing before an iconic skyline or exploring the intimate details of a neighborhood street, you’ll develop the technical foundation and creative vision needed to transform darkness into art. We’ll explore the gear that professionals rely on, decode the camera settings that produce crisp results despite challenging conditions, and reveal composition strategies that elevate snapshots into portfolio-worthy images. You’ll also learn creative approaches for capturing motion and atmosphere, discover how to scout and plan successful night shoots, and master post-processing workflows that bring your vision to life.
By the end of this journey, you’ll possess not just the knowledge to take better night photographs, but the confidence to venture into the darkness and return with images that capture the soul of the city after dark. The urban night awaits with endless possibilities—let’s begin your transformation into a master of nocturnal cityscape photography.
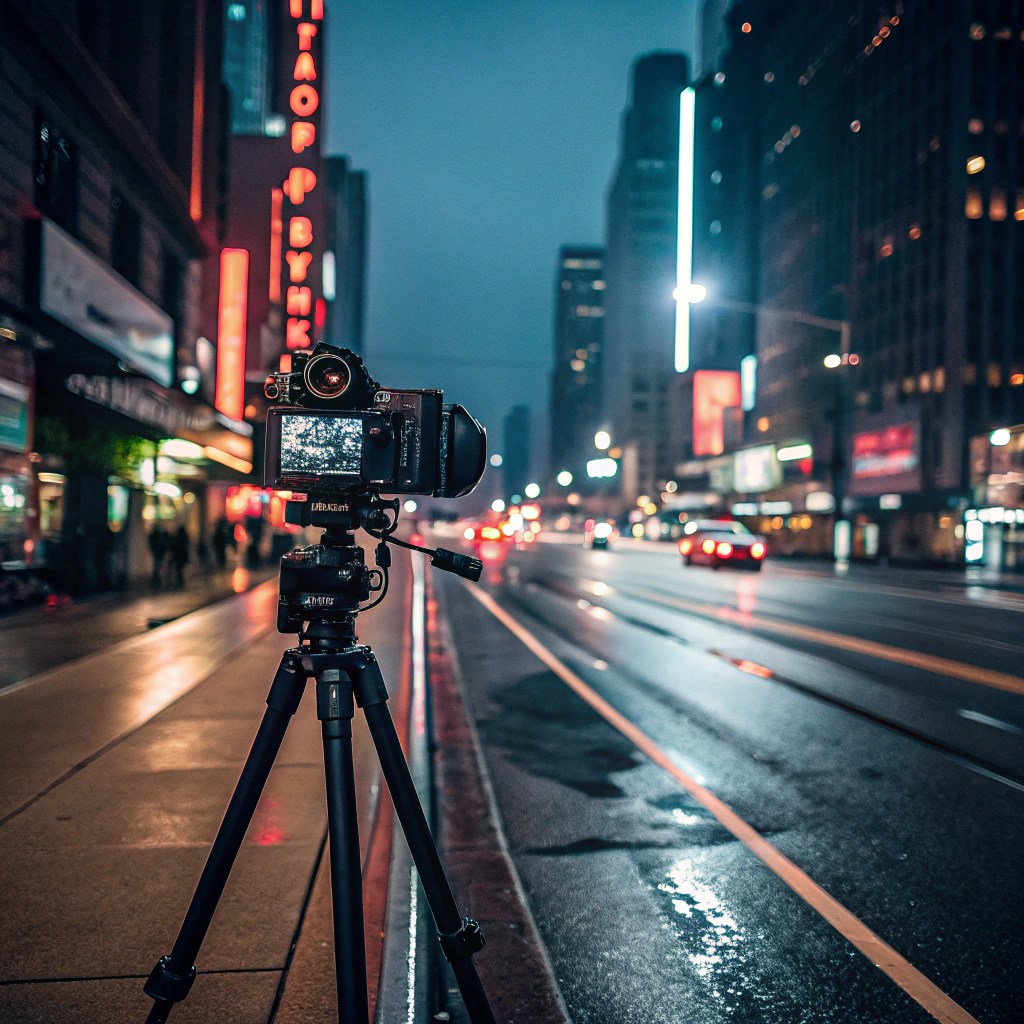
Essential Gear for Stunning Night Cityscapes
Success in night photography begins long before you press the shutter button—it starts with assembling the right toolkit. While it’s true that skill matters more than equipment, certain gear choices dramatically improve your ability to capture clean, sharp images in the challenging low-light environment of urban nightscapes. Understanding what equipment serves you best, and why, empowers you to make informed decisions that align with your creative goals and budget.
At the heart of your night photography system is the camera body itself. Modern DSLR and mirrorless cameras with full-frame CMOS sensors excel in low-light conditions, offering superior noise control at high ISO settings and excellent dynamic range to handle the extreme contrast between bright lights and deep shadows. Cameras like the Sony A7 series, Canon EOS R6, or Nikon Z series provide the sensor performance and responsive autofocus systems that make night shooting significantly more manageable. Even crop-sensor cameras from recent generations perform admirably, though you may need to be more conservative with your ISO choices.
Lens selection profoundly influences the character and capability of your night photography. Wide-angle lenses ranging from 16mm to 35mm are the workhorses of urban nightscape photography, allowing you to capture expansive cityscapes, towering skyscrapers, and sweeping street scenes that convey the scale and grandeur of the urban environment. Fast prime lenses with maximum apertures of f/1.4 to f/2.8 gather more light, enabling faster shutter speeds and lower ISO settings when needed. A 24mm f/1.4 or 35mm f/1.8 prime lens delivers exceptional sharpness and beautiful bokeh for isolating architectural details or street scenes, while zoom lenses like a 16-35mm f/4 offer compositional flexibility during exploratory shoots.
Camera Body
Full-frame sensor with excellent high-ISO performance and manual control options
Wide-Angle Lens
16-35mm range for expansive cityscapes; fast aperture for light gathering
Sturdy Tripod
Carbon fiber for stability during long exposures without adding excessive weight
A tripod is absolutely non-negotiable for serious night photography. Long exposures ranging from several seconds to half a minute or more require rock-solid stability that no human hand can provide. Carbon fiber tripods offer an ideal balance between stability and portability—they’re light enough to carry during extended urban explorations yet sturdy enough to anchor your camera during 30-second exposures even in moderate wind. Look for models that extend to comfortable eye level, feature a center column hook for adding weight for extra stability, and include a ball head or pan-tilt head that allows precise compositional adjustments.
Rounding out your essential kit, a remote shutter release or cable release eliminates the camera shake introduced by pressing the shutter button manually. Many modern cameras offer smartphone apps that provide wireless remote control, which works beautifully if you remember to charge your phone. For extra creative control, consider carrying Pro Mist or Black Mist filters that add a dreamy, cinematic glow to bright light sources, creating beautiful halation effects around street lamps and neon signs. Lens hoods reduce lens flare from stray light sources, while spare batteries are essential since cold night air and long exposures drain power quickly. Finally, a comfortable camera bag with weather protection keeps your gear safe during those unpredictable urban adventures.
Mastering Camera Settings for Night Urban Photography
Understanding and controlling your camera’s exposure triangle—ISO, aperture, and shutter speed—separates amateur night snapshots from professional-grade urban nightscapes. Unlike daytime photography where automatic modes often suffice, night photography demands manual control. The extreme lighting conditions, from brilliant neon signs to pitch-black shadows, confuse even sophisticated camera metering systems. By mastering manual mode, you gain the power to expose exactly as your creative vision dictates, balancing technical perfection with artistic intent.
ISO: Balancing Sensitivity & Noise
ISO controls your sensor’s sensitivity to light. In night photography, you’ll typically work between ISO 1600 and 3200 for handheld shots, or as low as ISO 400-800 when using a tripod for long exposures. Modern full-frame cameras produce remarkably clean images even at ISO 3200, though each camera has its sweet spot. Start conservatively and increase ISO only when necessary—higher values introduce digital noise that degrades image quality. The key is finding your camera’s threshold where noise remains acceptable.
Aperture: Controlling Depth & Sharpness
Aperture determines how much light enters through your lens and controls depth of field. For urban nightscapes, f/4 to f/8 delivers optimal results—wide enough to gather adequate light yet stopped down sufficiently to achieve excellent sharpness throughout the frame. Wider apertures like f/1.4 or f/2.8 gather more light but create shallow depth of field that may not keep your entire cityscape in focus. Very narrow apertures like f/16 can create appealing starbursts around point light sources but require longer exposures.
Shutter Speed: Freezing or Flowing Time
Shutter speed is where night photography becomes truly creative. Exposures of 5 to 30 seconds capture beautiful light trails from vehicle traffic, transform moving water into silky flows, and allow ambient light to accumulate for proper exposure. For sharp handheld shots, follow the reciprocal rule: use a shutter speed no slower than 1/(focal length). With a tripod, experiment freely—10 seconds might create subtle motion blur, while 30 seconds produces dramatic light trails that paint your composition.
When incorporating stars or the night sky in your urban nightscape, the 500 Rule becomes your guiding principle. Divide 500 by your lens focal length to determine the longest shutter speed that keeps stars sharp before Earth’s rotation creates visible trails. For a 24mm lens, that’s approximately 20 seconds (500 ÷ 24 ≈ 21). This rule helps you balance gathering enough light to expose the scene while maintaining pinpoint star sharpness. For full-frame cameras, some photographers use a modified 300 Rule for even sharper results, especially important if you plan to crop or print large.
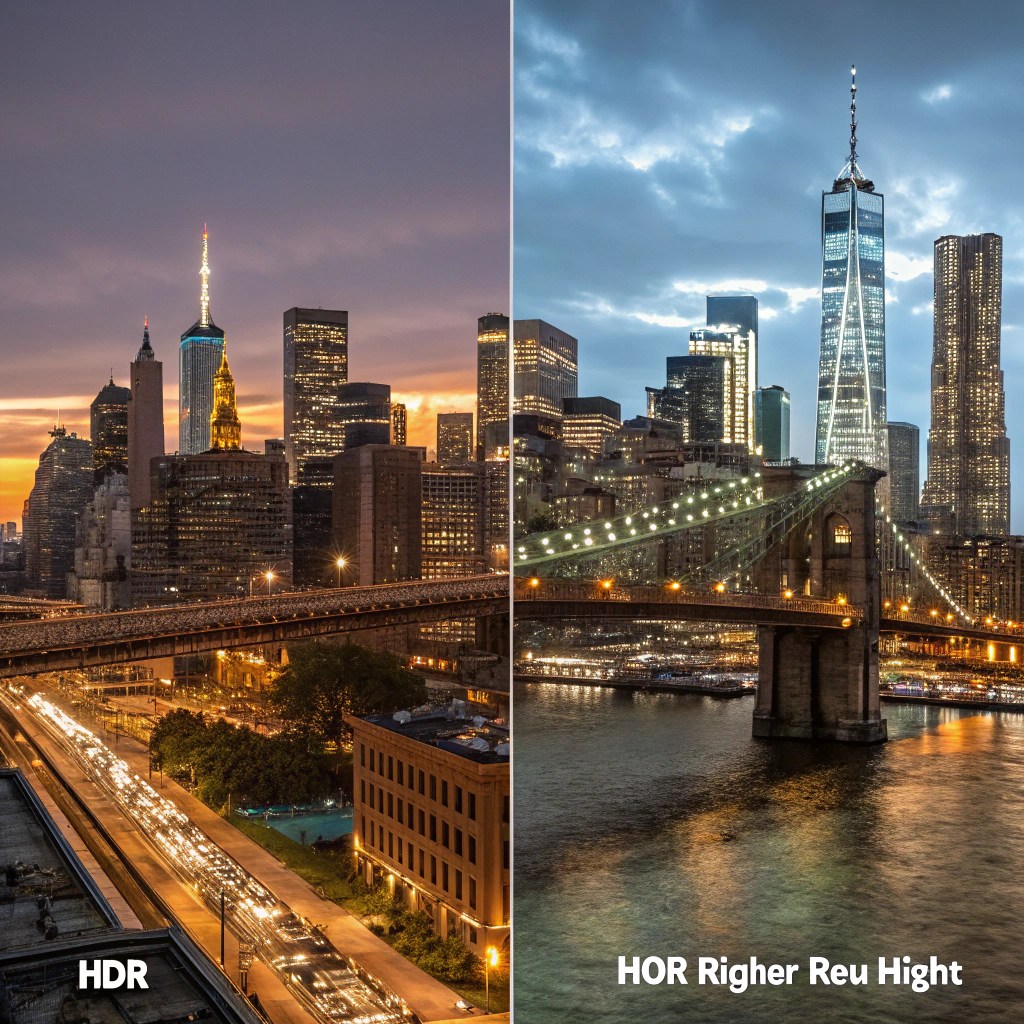
Exposure Bracketing for HDR
Urban nights present extreme dynamic range—brilliant light sources surrounded by deep shadows that exceed any camera’s ability to capture in a single exposure. Exposure bracketing solves this challenge by capturing multiple images at different exposures: one for the highlights, one properly exposed for midtones, and one for shadow detail. Merge these in post-processing to create HDR (High Dynamic Range) images that retain detail from the brightest neon sign to the darkest alleyway.
Set your camera to bracket in 1 or 2 EV increments, typically capturing three to five frames. Use aperture priority or manual mode to maintain consistent depth of field while the camera varies shutter speed. The result is comprehensive tonal information that gives you immense flexibility during editing.
Begin each night shoot by taking test exposures and reviewing both the image and histogram on your LCD screen. The histogram reveals whether you’re capturing detail across the tonal range or clipping highlights and shadows. In night photography, a small amount of blown highlights in very bright light sources is often acceptable and can even enhance the sense of brilliance, but preserve detail in most light sources and all shadow areas where you want visible information. With practice, you’ll develop an intuitive feel for these settings, adjusting them fluidly as lighting conditions and creative intent evolve throughout your shoot.
Composition Techniques to Elevate Your Night Shots
Technical mastery of camera settings captures light accurately, but compositional excellence transforms that captured light into compelling visual stories. Night photography offers unique compositional opportunities that don’t exist during the day—light itself becomes your primary compositional element, creating pathways, focal points, and emotional resonance. The most memorable urban nightscapes balance technical precision with thoughtful arrangement of visual elements that guide the viewer’s eye and communicate your artistic vision.
Leading Lines
Streets, sidewalks, and illuminated pathways create natural leading lines that draw viewers into your composition. Light trails from vehicle traffic form dynamic diagonal lines that add energy and movement. Railroad tracks, bridge cables, and building edges lit by architectural lighting establish strong geometric foundations. Position yourself so these lines converge toward your main subject or vanishing point, creating depth and guiding the eye through the frame. The interplay between static architectural lines and flowing light trails creates visual tension that captivates attention.
Natural Framing
Use architectural elements as natural frames around your subject—archways, doorways, bridge underpasses, or gaps between buildings all serve as compositional frames that focus attention and add depth. City lights act as natural spotlights, illuminating landmarks and architectural details while surrounding darkness provides negative space. This dramatic lighting creates high-contrast frames that make subjects pop. Experiment with foreground elements like tree branches or structural elements to create layered compositions with foreground, middle ground, and background interest.
Reflective Surfaces
Wet streets, puddles, glass buildings, and calm water bodies double your compositional possibilities by mirroring city lights and architecture. After rain, streets become liquid mirrors that reflect neon signs, street lamps, and building lights, creating symmetrical compositions that feel both grounded and dreamlike. Position your camera low to emphasize reflections, or shoot from above to capture both reality and reflection equally. Reflections add visual complexity and can transform simple scenes into mesmerizing studies of light and geometry.
Color Contrast
Urban nights explode with color—warm sodium street lamps cast amber glows, neon signs blaze in magenta and cyan, LED billboards cycle through the entire spectrum, while the ambient night sky contributes cool blue tones. Deliberately compose to emphasize color contrasts: warm lights against cool shadows, complementary colors side by side, or monochromatic harmony. These color relationships create emotional resonance and visual interest. Be mindful of white balance—choose a setting that preserves the scene’s natural color temperature or intentionally shift it to emphasize warm or cool tones.
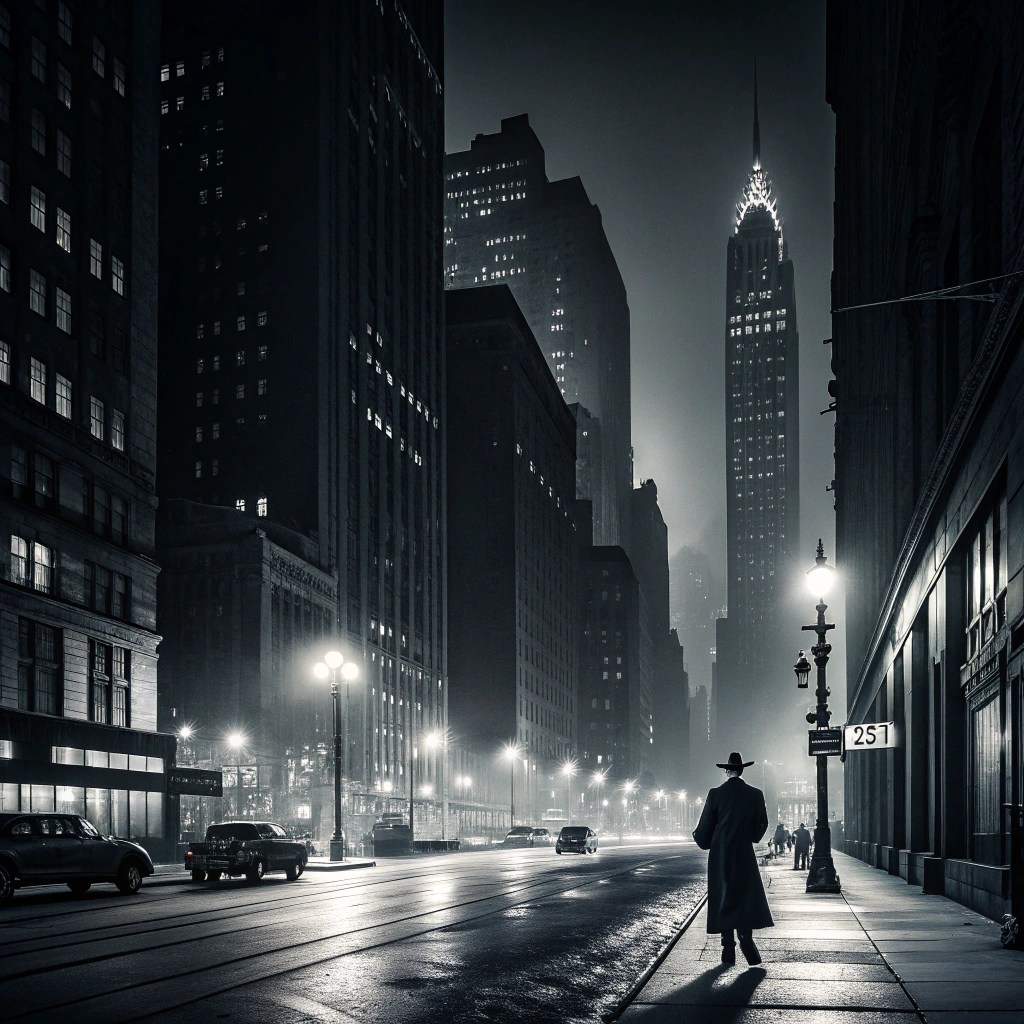
The Power of Black & White
While color night photography celebrates urban luminosity, black and white night photography offers a completely different emotional palette. Removing color emphasizes form, texture, contrast, and mood. Architectural details emerge more prominently, light and shadow create dramatic chiaroscuro effects, and the viewer focuses on composition rather than chromatic appeal.
Black and white night photography particularly excels for moody urban scenes, film noir aesthetics, and highlighting geometric patterns in architecture. Shoot in RAW format and convert to monochrome during post-processing for maximum control over tonal relationships. This approach lets you emphasize specific tones and create more nuanced, sophisticated black and white images than in-camera conversions.
Remember the rule of thirds and other classical compositional principles remain valuable in night photography, but don’t let them constrain your creativity. The unique lighting conditions of urban nights sometimes demand breaking traditional rules. Center compositions can work beautifully when symmetry serves your vision. Extreme foreground elements that would overwhelm daylight shots add mystery and depth at night. Trust your eye, experiment boldly, and let the interplay of light and darkness guide your compositional choices. The most memorable night photographs often emerge when technical knowledge supports creative risk-taking.
Creative Approaches: Capturing Motion and Atmosphere
Beyond foundational technique lies the realm of creative experimentation where night photography truly comes alive. Urban environments after dark offer dynamic elements—moving vehicles, walking pedestrians, changing lights, atmospheric conditions—that you can capture and manipulate through exposure choices and timing. These creative approaches transform straightforward documentation into artistic interpretation, infusing your nightscapes with energy, mystery, and visual poetry that transcends literal representation.
Light Trail Magic
Vehicle headlights and taillights become luminous ribbons when captured with shutter speeds of 10-30 seconds. Position yourself above traffic for sweeping curves through urban canyons, or shoot at street level for dynamic leading lines. Red taillights and white headlights create complementary color flows. Timing matters—wait for gaps in traffic then capture during the next rush to create distinct, separated trails rather than solid masses of light.
Ghosting Effects
Long exposures make moving pedestrians semi-transparent or invisible, creating hauntingly empty cityscapes or ethereal figures that suggest rather than define human presence. Exposures of 20-60 seconds render most people as faint blurs or eliminate them entirely, while static architecture remains sharp. This technique works beautifully in crowded tourist areas where you want to emphasize place over people, or for surreal compositions that question reality.
Ambient Light as Key Light
Rather than bringing artificial lighting, use existing urban illumination creatively. Neon signs become vibrant key lights casting colored glows on nearby surfaces. Shop windows spill warm light onto sidewalks. Digital billboards cycle through colors that transform your scene every few seconds. Position subjects or compose scenes to leverage these ambient sources, creating naturally lit moments that feel authentic to the urban night environment.
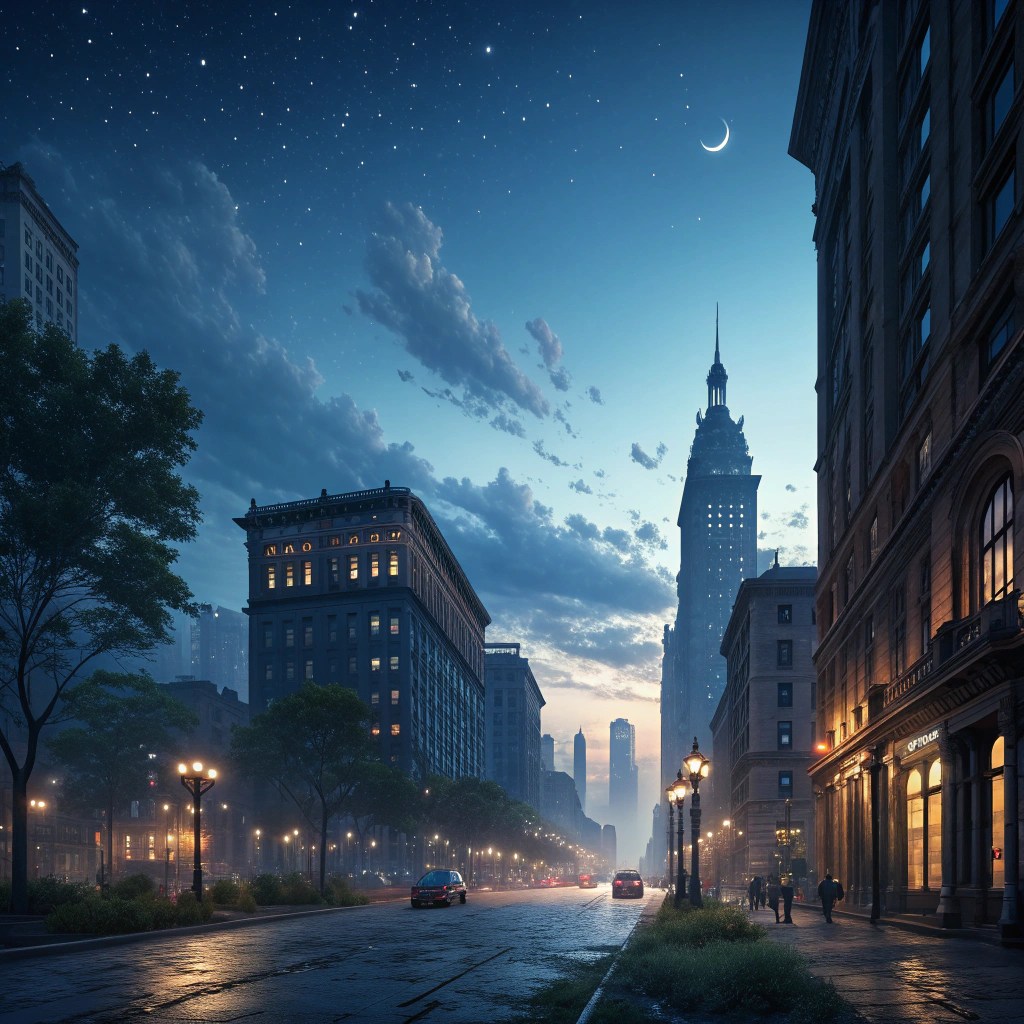
Timing Your Mood
The quality and emotional character of urban night photography changes dramatically depending on when you shoot. Blue hour—the 20-40 minutes after sunset or before sunrise—offers deep blue skies that balance beautifully with city lights, creating sophisticated compositions where neither sky nor ground dominates. The ambient light is sufficient to reveal architectural detail and color while artificial lights shine brilliantly.
Late night, hours after sunset, brings deeper darkness and higher contrast. Lights appear more dramatic against black skies, creating moodier, more mysterious atmospheres. Streets empty, reducing visual clutter and enhancing isolation or solitude themes. Experiment with both timing approaches to discover which aligns with your creative vision for each location.
Atmospheric conditions dramatically affect night photography mood and quality. Fog transforms ordinary cityscapes into dreamlike scenes where lights glow through mist with ethereal halos, and distant buildings fade into obscurity, creating layered depth through atmospheric perspective. Rain-slicked streets double every light source through reflections while adding sparkle and texture to surfaces. Light mist diffuses harsh light sources, creating softer, more romantic illumination. Rather than canceling your shoot when weather isn’t perfect, embrace these conditions as creative opportunities.
Foggy Mystique
Fog creates volumetric light beams and diffuses harsh light sources into soft glows. Buildings emerge and recede based on distance, creating natural depth. The mysterious atmosphere transforms familiar locations into otherworldly scenes.
Rainy Reflections
Rain creates mirror surfaces that double compositional possibilities. Every light source reflects, creating symmetrical patterns and added visual interest. Raindrops on glass add foreground texture and diffraction effects around lights.
Misty Romance
Light mist softens everything without obscuring completely. Harsh light sources bloom gently, creating romantic, cinematic atmospheres. Detail remains visible while everything gains a dreamy quality that enhances emotional impact.
The creative possibilities in night photography are limited only by your imagination and willingness to experiment. Try intentional camera movement during long exposures to create abstract light paintings. Use multiple exposures to layer different moments of moving light. Zoom during exposure for dynamic radial effects. Each technique opens new creative doors, and the urban night provides an endless playground for exploring these approaches.
Location Scouting and Planning Your Night Shoot
Exceptional night photography rarely happens by accident—it results from thoughtful preparation and strategic planning. While spontaneous discoveries certainly occur, consistently producing outstanding urban nightscapes requires understanding your locations, timing your shoots precisely, and anticipating technical and logistical challenges. Proper scouting and planning maximize your creative time behind the camera while minimizing frustration and missed opportunities.
Research Phase
Begin by researching potential locations through online resources, photography communities, and location guides. Study other photographers’ work from these locations to understand what’s been done and identify opportunities for fresh perspectives. Use Google Earth and Street View to virtually scout positions, sight lines, and foreground elements. Save promising locations to custom maps for easy reference during shoots.
Daylight Reconnaissance
Visit locations during daylight to assess accessibility, identify composition opportunities, and note potential challenges. Walk the area to discover vantage points, foreground elements, and interesting angles. Check for obstructions like construction, scaffolding, or vegetation that might block views. Identify nearby parking, public transit access, and facilities. Take reference photos and GPS coordinates of promising spots.
Technical Planning
Calculate optimal shooting times using apps like PhotoPills or The Photographer’s Ephemeris. Determine when blue hour occurs, moon phases for ambient light considerations, and whether celestial elements like the Milky Way align with your composition. Check weather forecasts for clear skies or interesting atmospheric conditions. Create shot lists and gear checklists to ensure you bring everything needed.
Safety & Logistics
Assess safety considerations including neighborhood security, traffic patterns, and working alone versus with companions. Inform someone of your plans and expected return time. Ensure you have charged batteries, memory cards with ample space, warm clothing, and emergency supplies. For popular locations, arrive early to claim optimal positions before crowds gather.
Timing Strategy
Should you embrace the energy of crowds and traffic, or seek serene emptiness? Each approach offers distinct creative opportunities. Peak traffic hours create vibrant light trails and urban energy that conveys the pulse of city life. Streets filled with pedestrians add human scale and activity, though they may complicate long exposures and tripod placement.
Conversely, late night or early morning hours deliver empty streets perfect for architectural studies, creating contemplative atmospheres that emphasize solitude and the city’s structural beauty. Traffic is lighter, allowing cleaner light trails or completely static scenes. Fewer people mean easier tripod positioning and less interrupted shooting time. Consider your creative intent—does this scene benefit from bustling energy or quiet introspection?
Weather & Moon Phases
Weather profoundly impacts night photography. Clear skies showcase stars and provide consistent lighting, ideal for skyline compositions. Partly cloudy conditions add drama as clouds catch reflected city light, creating dynamic skies. Check moon phases—full moons add ambient light that illuminates landscapes and reduces reliance on artificial light, while new moons create darker skies that make stars and city lights more prominent. Plan shoots around these factors to match your creative vision.
Light Pollution Mapping
Light pollution affects how celestial elements appear in your urban nightscapes. Use light pollution maps like lightpollutionmap.info to understand ambient light levels at potential locations. Urban cores exhibit extreme light pollution that washes out stars but creates vibrant cityscapes. Suburban edges or elevated positions offer compromises where you can capture both city lights and some night sky detail. For shots incorporating stars or the Milky Way, seek locations with darker skies or elevated vantage points above the urban light dome.
Planning Apps & Tools
Modern smartphone apps revolutionize location planning. PhotoPills calculates sun, moon, and Milky Way positions with augmented reality overlays showing exactly where celestial elements appear. The Photographer’s Ephemeris maps light direction and timing. Weather apps provide hourly forecasts and cloud cover predictions. Google Earth reveals terrain and vantage points. These tools transform planning from guesswork into precision, letting you arrive confident that conditions align with your creative vision.
Remember that plans provide direction, not mandates. Remain flexible and open to spontaneous discoveries. That unexpected reflection, that perfectly timed pedestrian silhouette, that atmospheric mist rolling in—these unplanned moments often produce your most memorable images. Preparation creates the foundation for success, but creativity flourishes when you balance planning with present-moment awareness and artistic intuition.
Post-Processing Tips for Urban Night Photography
The creative process doesn’t end when you pack up your tripod—it continues and often culminates in post-processing. Night photography captures tremendous tonal and color information, but RAW files directly from camera rarely represent the scene as you experienced it or as you envision the final image. Thoughtful editing enhances your photographs while remaining true to your artistic intent, transforming good captures into exceptional final images that realize your creative vision.
HDR Merging
Combine your bracketed exposures in software like Lightroom, Photoshop, or specialized HDR tools like Aurora HDR. The goal is natural-looking results that preserve detail from highlights to shadows without the artificial “HDR look” of over-processed images. Align images precisely to avoid ghosting artifacts from moving elements. Adjust tone mapping carefully to maintain realistic contrast while revealing detail in both bright lights and dark shadows.
Noise Reduction
High ISO shooting introduces luminance and color noise that degrades image quality. Apply noise reduction judiciously—too little leaves distracting grain, too much creates plastic-looking smoothness that destroys texture and detail. Use tools like Lightroom’s Detail panel or specialized software like Topaz DeNoise AI. Adjust luminance noise reduction more aggressively than color noise reduction. Apply sharpening after noise reduction to restore edge definition.
Color Enhancement
Night scenes benefit from selective color adjustments that make lights pop without oversaturation. Use HSL sliders to enhance specific colors—boost the vibrancy of neon signs, warm up sodium street lamps, or cool down ambient shadows. Adjust individual color luminance to create separation between elements. Be subtle with overall saturation increases; instead, selectively enhance specific hues that contribute to your vision while keeping others natural.
Contrast & Clarity
Night photography thrives on dramatic contrast between light and shadow. Use the contrast slider globally, but refine with tone curves for precise control over highlights, midtones, and shadows independently. The clarity slider enhances local contrast, making details pop—particularly effective on architectural elements and texture.
However, excessive clarity creates haloing artifacts around edges and unrealistic sharpness. Apply moderately to the entire image, or use graduated filters and adjustment brushes to apply clarity selectively to areas where enhanced detail serves your composition. Negative clarity in specific areas can create atmospheric softness around light sources.
Import & Organize
Import RAW files and organize by location or shoot. Apply initial lens correction profiles and enable chromatic aberration removal.
Merge & Align
If shooting bracketed exposures, merge to HDR or manually blend exposures using layer masks in Photoshop.
Global Adjustments
Set white balance, adjust overall exposure, and establish baseline contrast. This creates your foundation.
Targeted Refinement
Use graduated filters, radial filters, and adjustment brushes to selectively enhance specific areas—brightening foregrounds, darkening skies, or emphasizing key elements.
Color Grading
Fine-tune colors using HSL adjustments and color grading tools to achieve your desired mood and aesthetic.
Noise & Sharpening
Apply noise reduction followed by appropriate sharpening. Adjust output sharpening based on intended display medium.
Final Polish
Add finishing touches—vignettes, subtle bloom on light sources, or creative effects that enhance without overwhelming.
Creating subtle bloom and halation effects replicates how our eyes perceive bright lights—with soft glows rather than hard edges. In Photoshop, duplicate your background layer and apply Gaussian Blur. Change the blend mode to Screen or Lighten and reduce opacity until you achieve a subtle glow around light sources. Use layer masks to selectively apply this effect only to bright lights, not the entire image. This technique adds a dreamy, cinematic quality while maintaining overall sharpness.
Develop Consistent Workflows: Create Lightroom presets for your typical night photography adjustments—noise reduction settings, color preferences, sharpening amounts—to speed up editing while maintaining consistency across your portfolio. Presets serve as starting points that you refine for each individual image, not one-click solutions that homogenize your work.
The most important principle in post-processing is serving your creative vision while maintaining technical quality and authenticity. Editing should enhance what exists in your capture, not create something entirely different. Develop your personal editing style through experimentation, studying work you admire, and honest self-critique. Your post-processing workflow should become second nature, freeing you to focus on creative decisions rather than technical steps.
Case Study: From Shoot to Final Image
Theory illuminates the path, but practical application reveals the journey. Let’s walk through a complete night photography workflow—from initial concept through capture to final polished image—demonstrating how technical knowledge, creative vision, and post-processing refinement combine to create a compelling urban nightscape. This case study follows the creation of a neon-lit street scene featuring reflections and light trails, illustrating decision-making at each stage.
Conceptualization & Planning
The vision: capture a vibrant downtown street after rainfall, using reflections in wet pavement to create visual depth while light trails from passing vehicles add energy and movement. The goal is conveying urban vitality with a cinematic, slightly moody aesthetic that balances warmth from neon signs against cool ambient light.
Location scouting identified a busy intersection lined with neon-lit restaurants and bars. A previous daytime visit revealed excellent sightlines from a pedestrian bridge overlooking the street, providing an elevated vantage point for capturing both the street level and reflections. Weather forecasts predicted light rain during evening hours—perfect for creating reflective surfaces. The plan called for shooting during blue hour when ambient sky light balances with artificial lighting, creating sophisticated color relationships rather than harsh contrast.
7:15 PM – Arrival
Arrived 30 minutes before blue hour to set up tripod, compose shot, and take test exposures while sufficient ambient light remained.
7:45 PM – Blue Hour Begins
Perfect timing as neon signs illuminate fully while deep blue sky provides beautiful backdrop. Begin primary shooting.
8:15 PM – Peak Conditions
Light balance ideal. Captured bracketed sequences during traffic flow for light trails combined with well-exposed architecture.
8:45 PM – Completion
Blue hour fading to night. Captured additional darker exposures for variety before packing up equipment.
Camera Setup & Exposure Choices
Equipment Used
- Sony A7 III (full-frame mirrorless)
- Sony 24mm f/1.4 GM lens
- Carbon fiber tripod with ball head
- Wireless remote shutter
- Circular polarizer (removed for final shots)
Initial Settings
- Manual mode
- ISO 800 (on tripod, keeping noise minimal)
- Aperture f/8 (balancing sharpness with light gathering)
- Shutter speed 15 seconds (for light trails)
- Manual focus (critical for tack-sharp results)
Composition centered on the intersection with converging streets creating leading lines toward the vanishing point. The elevated position allowed capturing both the street level activities and their reflections in wet pavement, creating a symmetrical upper-and-lower visual structure. Neon signs on both sides of the street provided color balance and framing elements.
Initial test shots at f/5.6 showed slight softness in corners, so stopped down to f/8 for optimal sharpness across the frame. Experimented with shutter speeds from 10 to 25 seconds—15 seconds produced ideal light trails with distinct separation between individual vehicles rather than continuous light masses. Set up exposure bracketing at -2, 0, +2 EV to capture full dynamic range from bright neon to shadow detail.
Capturing the Perfect Moment
Patience proved essential. Waited for optimal moments when vehicle positions created balanced light trails through the composition rather than clustering awkwardly. Captured approximately 15 bracketed sequences over 45 minutes, each consisting of three exposures. Between sequences, reviewed histograms to ensure proper exposure across the tonal range, with bright highlights just touching the right edge but not clipping significantly.
One unexpected challenge: a mounted police officer entered the frame and remained stationary throughout a 15-second exposure, creating a sharp silhouette. While unplanned, this added a human element and sense of scale. Sometimes the best moments emerge from embracing the unexpected rather than waiting for perfect isolation.
Post-Processing Workflow
HDR Merge & Initial Adjustments
Selected the strongest sequence and merged to 32-bit HDR DNG in Lightroom. Applied lens corrections and adjusted white balance to 4800K, warming the scene slightly to enhance neon colors while retaining cool blue ambient tones. Set initial exposure compensation +0.3 to brighten overall image subtly.
Tone Curve Refinement
Used tone curves to establish stronger contrast—lifted shadows to reveal reflected detail in wet pavement, pulled highlights down slightly to preserve neon sign detail. Created a subtle S-curve in midtones to add punch without crushing blacks or blowing highlights.
Color Grading & Enhancement
Used HSL panel to boost saturation in reds and magentas (neon signs), oranges (warm street lighting), and aquas (cooler accent lights). Decreased saturation in yellows to prevent oversaturation. Adjusted individual color luminance to create separation between overlapping tones.
Selective Adjustments
Applied graduated filter from top to darken sky subtly, increasing drama. Used radial filters around key neon signs to enhance local contrast and make them pop. Applied adjustment brush to brighten the police officer silhouette for better definition against background.
Noise Reduction & Sharpening
Applied moderate luminance noise reduction (50) and minimal color noise reduction (25) since ISO 800 produced clean files. Sharpened at Amount 70, Radius 1.0, Detail 25 with masking at 60 to target edges while avoiding smooth areas.
Final Touches in Photoshop
Exported to Photoshop for finishing. Created duplicate layer with Gaussian Blur at 30 pixels, set to Screen blend mode at 15% opacity, masked to apply only to brightest light sources for subtle bloom effect. Added gentle vignette to draw eye toward center. Applied final output sharpening optimized for web display.
Before & After Comparison

The transformation from RAW capture to final image demonstrates the power of thoughtful post-processing. The original file appears flat, with muddy colors and insufficient separation between tonal zones. The final image delivers rich colors, dramatic contrast, defined light trails that guide the eye through the composition, and enhanced reflections that create visual depth. Neon signs glow with cinematic intensity while retaining detail and realism.
Key Takeaway: This image succeeded because of alignment between pre-visualization, technical execution, and post-processing refinement. Each stage served the creative vision—planning ensured optimal timing and position, camera technique captured necessary tonal information, and editing revealed the scene’s full potential. This integrated approach, where every decision supports your artistic intent, separates memorable images from mere technical exercises.
Conclusion: Your Journey Into Urban Night Photography Begins Now
We’ve journeyed together through the comprehensive landscape of urban night photography—from understanding essential gear and mastering technical camera settings, through compositional strategies and creative approaches, to location planning and post-processing refinement. You now possess the foundational knowledge required to venture into the darkness with confidence and return with images that capture not just light, but emotion, atmosphere, and story.
Master Your Tools
Understanding your camera’s capabilities and the exposure triangle gives you technical control. Practice until manual settings become intuitive, freeing your mind to focus on creative vision rather than technical struggles.
Compose with Purpose
Every element in your frame should serve your narrative. Use leading lines, reflections, color contrast, and light itself as compositional tools that guide viewers through your visual story.
Embrace Experimentation
The most exciting discoveries happen when you push boundaries. Try new techniques, explore unusual locations, shoot in challenging conditions—growth emerges from creative risk-taking.
Develop Your Voice
Technical excellence provides the foundation, but your unique perspective creates memorable work. Study masters, learn from peers, but ultimately trust your vision and develop a style that’s authentically yours.
Remember that exceptional night photography demands patience and persistence. Your first outings may produce frustration alongside a few successful images—this is normal and part of the learning process. Each shoot teaches lessons about light, timing, composition, and your equipment’s capabilities. Review your images critically, identify what works and what doesn’t, and carry those lessons into your next adventure. Progress comes through consistent practice and thoughtful reflection.
Share Your Vision
Photography thrives in community. Share your night photographs on social media, photography forums, and portfolio websites. Engage with other night photographers, offer constructive feedback, and remain open to critique that helps you grow. Join local photo walks or online communities focused on urban and night photography.
Your unique perspective on familiar cities offers fresh ways of seeing that others appreciate. Don’t wait until you consider yourself an “expert”—share your journey from the beginning. The night photography community welcomes enthusiastic learners as warmly as experienced veterans.

As you embark on your night photography journey, carry this masterclass knowledge as tools in your creative toolkit, but don’t let technical considerations overwhelm the fundamental joy of capturing beautiful light in darkness. Stay curious, remain patient with yourself, and never lose sight of why you picked up a camera in the first place—to create images that move you and, hopefully, move others.
The urban night awaits with endless stories written in light and shadow. Your camera is ready. Your knowledge is solid. Your creativity is unlimited. Now it’s time to step into the darkness and illuminate your unique vision of the city after dark.
Possibilities
Every night offers new lighting conditions, weather, and moments to capture
Your Vision
Only you can create images that reflect your unique perspective and artistic voice
Light & Magic
Urban environments transform continuously, offering photography opportunities around the clock
Connect & Share Your Work
Join the global community of night photographers exploring urban landscapes after dark. Share your images, techniques, and creative discoveries using these hashtags to connect with fellow enthusiasts and inspire others beginning their journey:
- #NightPhotography
- #UrbanNightPhotography
- #CityscapePhotography
- #NightPhotographyTips
- #LongExposureShots
- #NightCityLights
- #UrbanPhotographyMasterclass
- #Nightscape
- #LightTrails
- #CityAtNight
Your night photography journey begins now. Go forth and capture the extraordinary beauty that emerges when cities illuminate against the darkness. The streets are waiting, your camera is ready, and your creative vision is the only limit. Welcome to the world of urban night photography—where every evening offers new magic to discover and share.

Leave a comment